React vs React Native (Feat. Expo) 알아야 할 차이점 & 주의사항 (1)
최근에 앱 개발에도 관심이 생겨 React 경험을 살려 React Native를 공부를 시작했습니다. 특히 Expo 덕분에 React Native 생태계가 크게 성장했고 개발 환경도 많이 편리해졌다고 합니다. 공식 문서에서도 기존의 CLI 대신 Expo를 사용할 것을 권장하고 있습니다.
React와 비슷하면서도 네이티브 기반이라는 점에서 여러 차이와 주의할 부분이 존재했습니다.
이번 글에서는 제가 공부하면서 느낀 React Native (Feat. Expo)의 주의사항과 차이점을 기록하려 합니다.
기본적인 태그 사용법
기본적으로 리액트 네이티브 환경은 브라우저의 DOM이 없습니다
기존에 React에서 사용하던 HTML 태그 (<div>, <span>, <p> 등)의 사용은 모두 불가합니다. 대신 네이티브 환경에서 제공하는 전용 컴포넌트를 사용해야 합니다.
View 태그
div 태그와 비슷한 컨테이너 역할을 합니다.
Text 태그
텍스트를 표시할 때는 꼭 Text 태그 안에 넣어줘야 합니다. 직접 텍스트를 View 태그에 넣으면 오류가 터집니다.
import { Text, View } from "react-native";

export default function TestScreen() {
  return (
    <View>
      <Text>테스트 스크린</Text>
    </View>
  );
}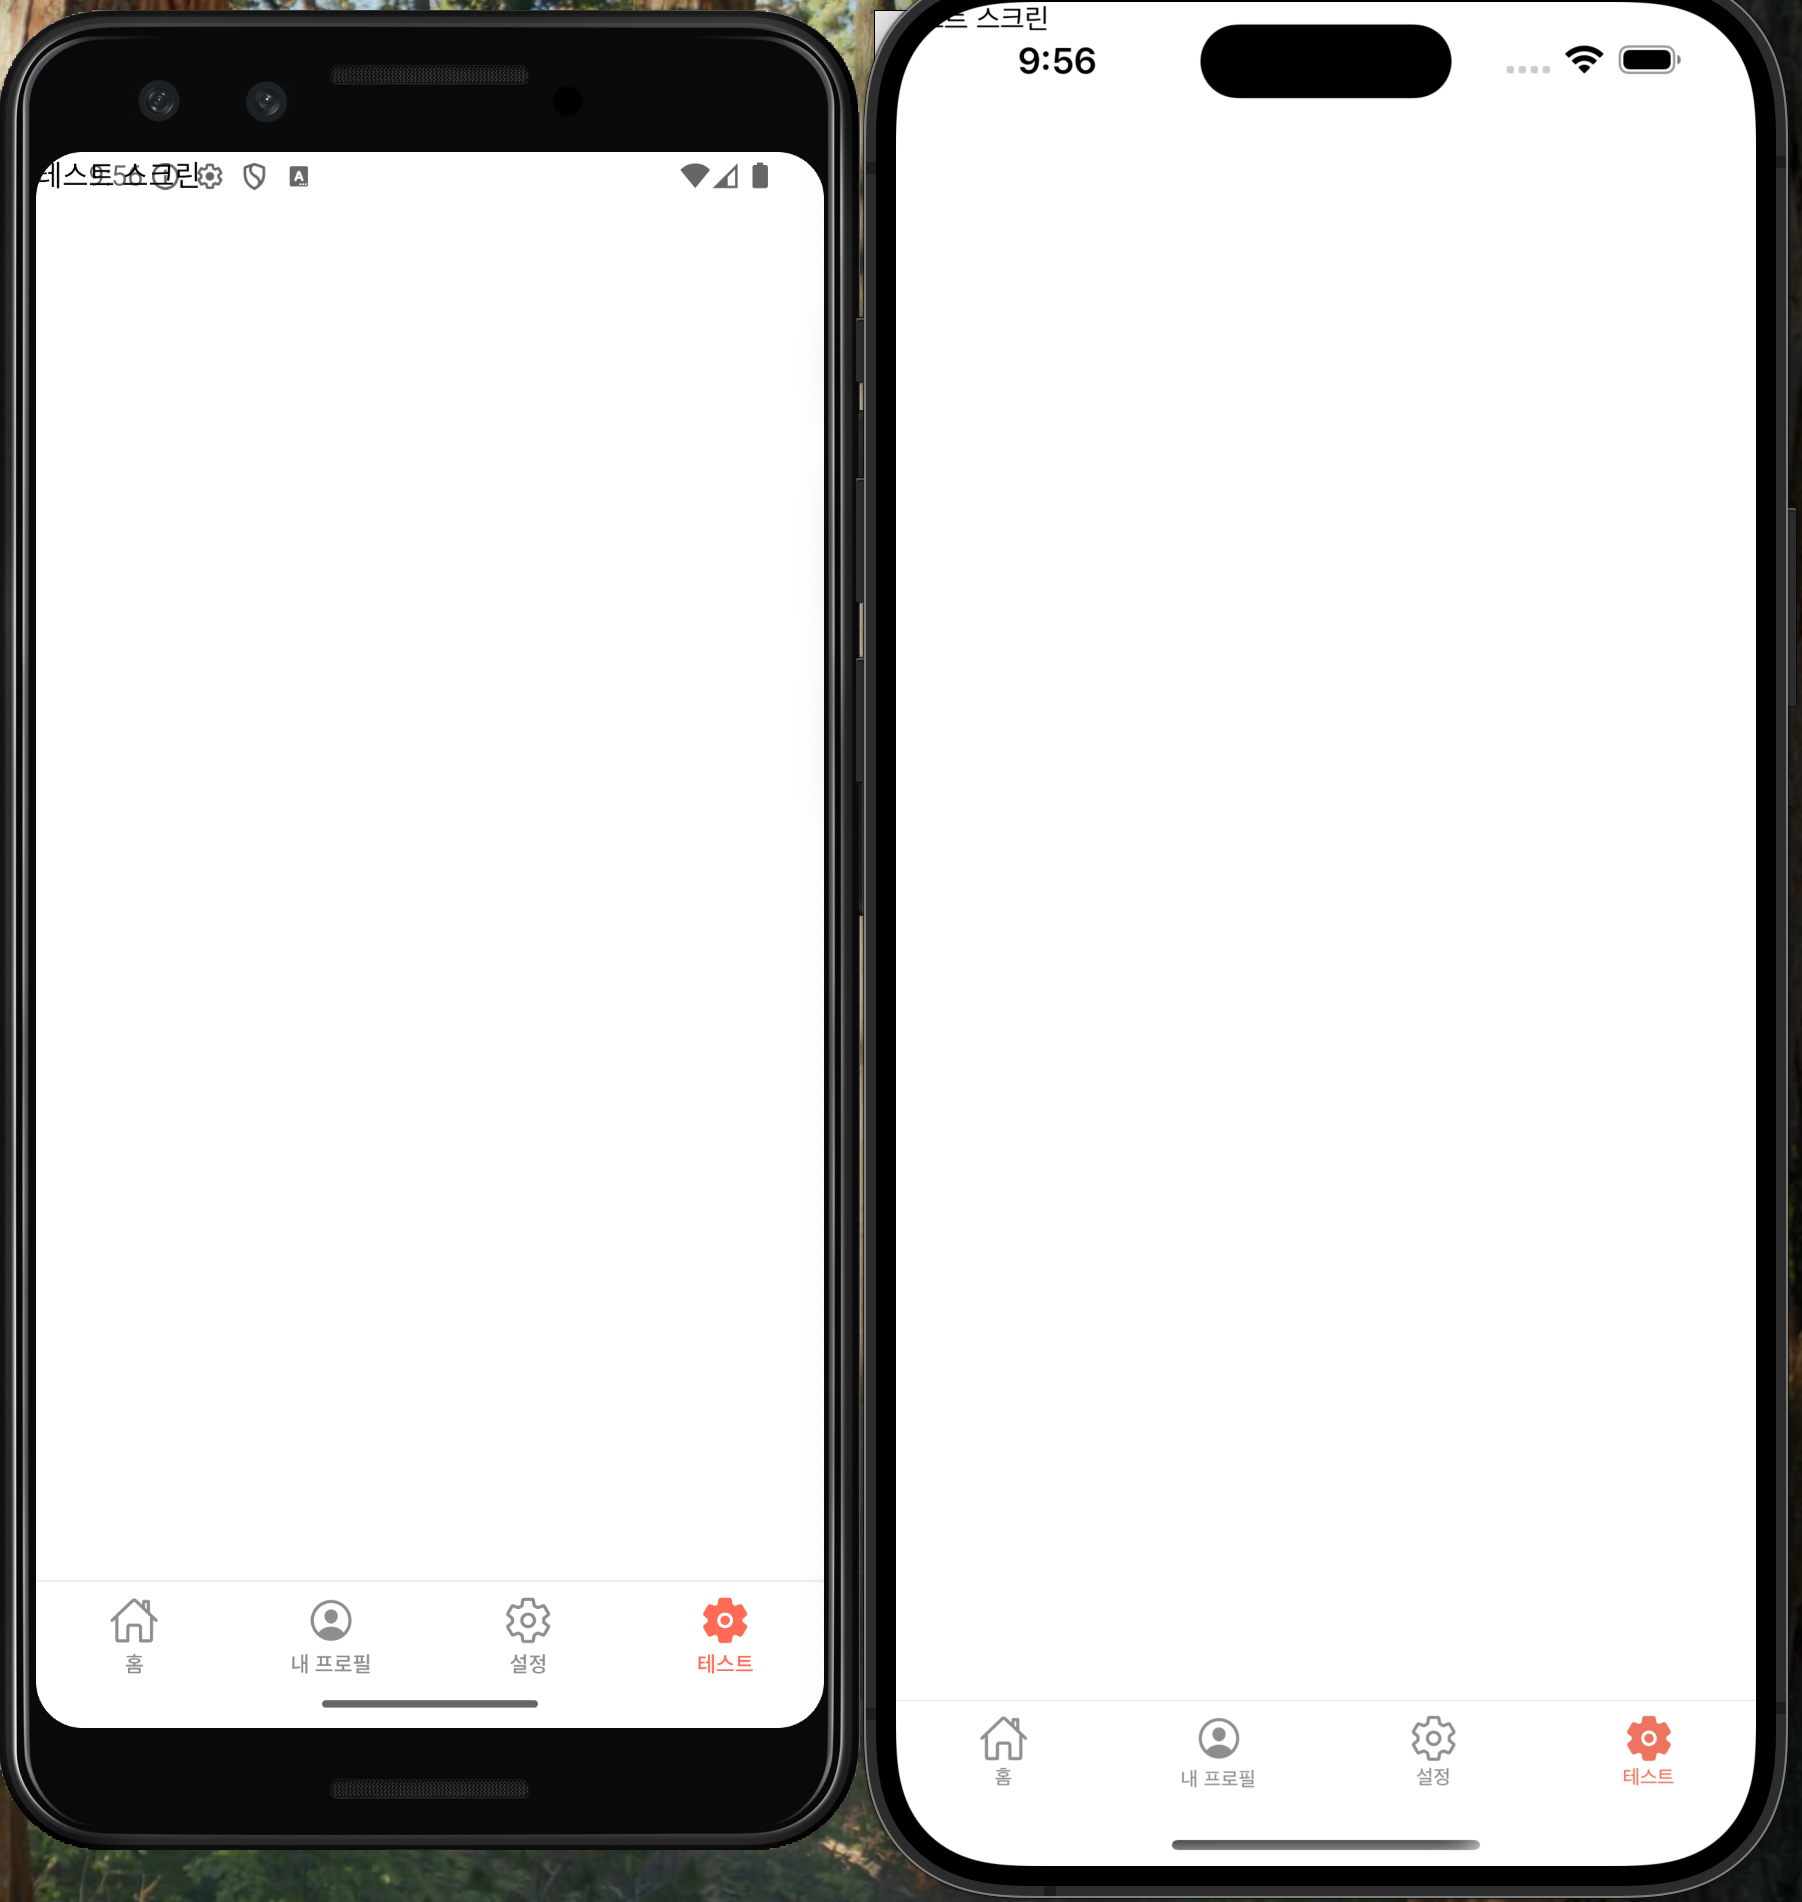
하지만 android, ios 환경 모두 텍스트가 너무 상단에 바짝 붙어 의도한대로 화면이 보이지 않습니다.
import { Text } from "react-native";
import { SafeAreaView } from "react-native-safe-area-context";

export default function TestScreen() {
  return (
    <SafeAreaView>
      <Text>테스트 스크린</Text>
    </SafeAreaView>
  );
}
이때 react-native-safe-area-context 라이브러리가 제공하는 SafeAreaView를 통해 컴포넌트를 감싸주면 기기의 안전 영역 안에서만 UI가 표시되어 정상적으로 텍스트가 보입니다.
(Expo 환경에서는 해당 라이브러리가 기본적으로 설치 되어있어 바로 사용 가능합니다.)
Image 태그
이미지를 삽입할때 사용하는 태그입니다.
import { Image, Text } from "react-native";
import { SafeAreaView } from "react-native-safe-area-context";

export default function TestScreen() {
  return (
    <SafeAreaView>
      <Image
        source={{
          uri: "https://reactnative.dev/img/tiny_logo.png",
        }}
        style={{ width: 50, height: 50 }}
      />
      <Text>테스트 이미지</Text>
    </SafeAreaView>
  );
}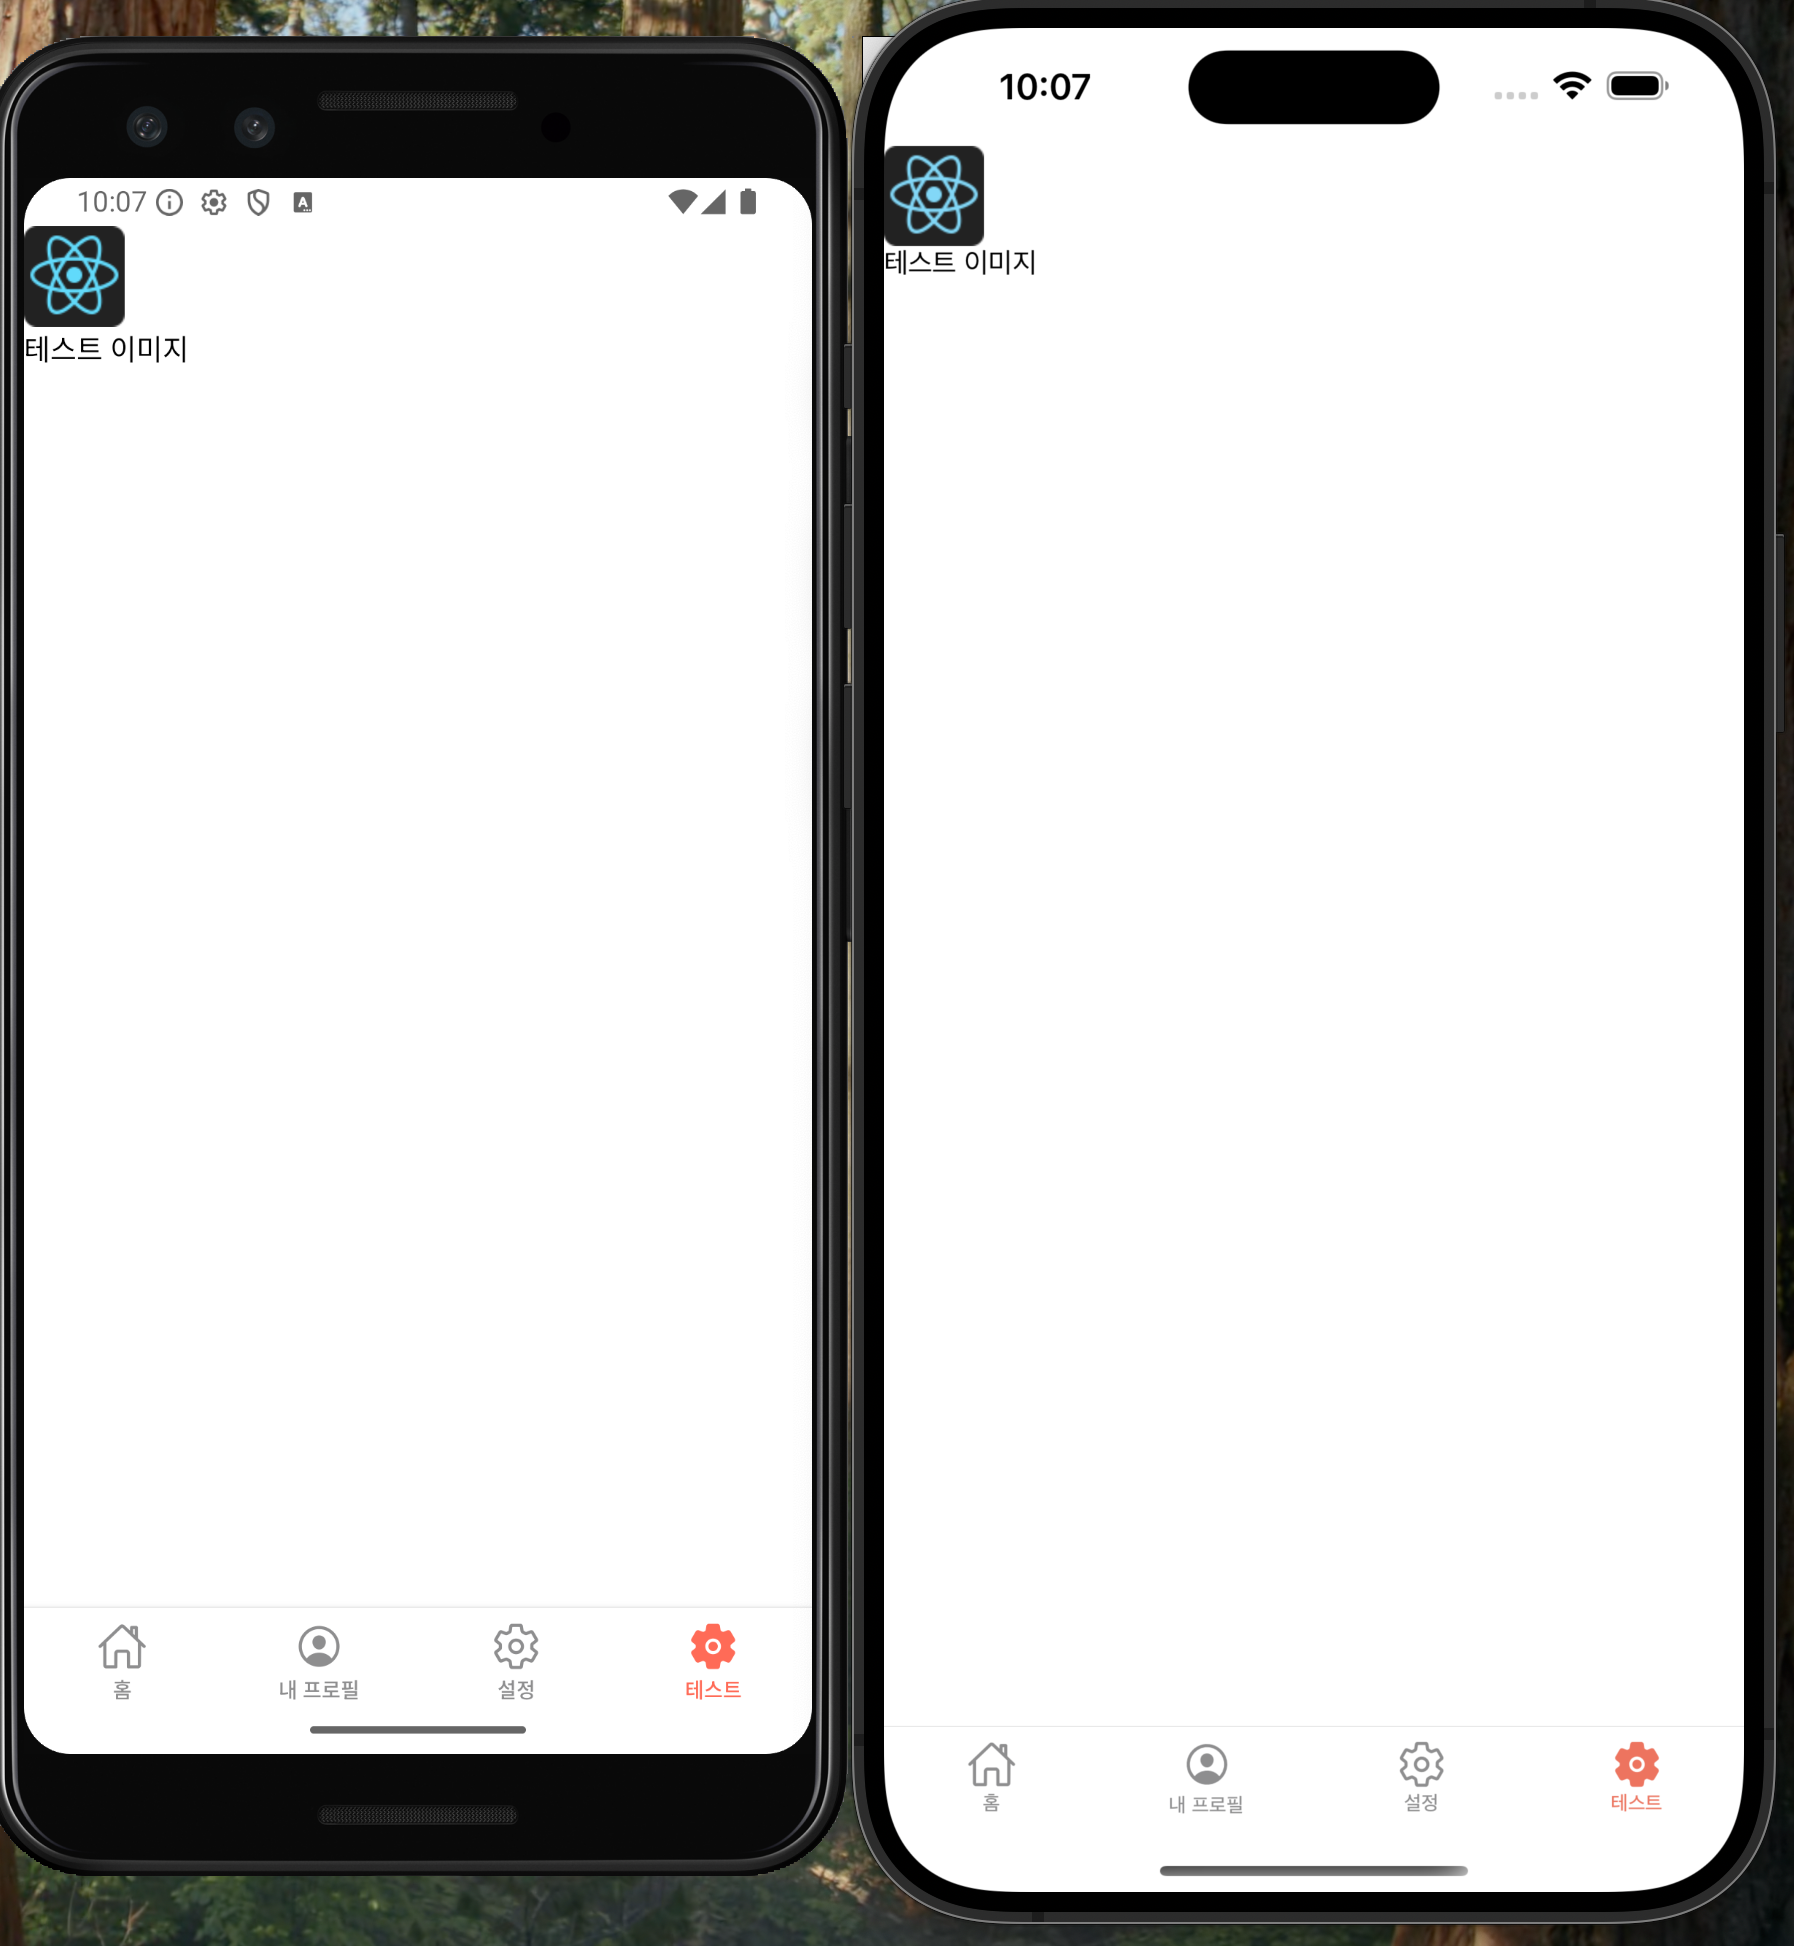
1. src 대신 source prop을 사용합니다.
외부 이미지는 source={{ uri: "이미지주소" }} 형태로 작성합니다.
2. 반드시 width와 height 값을 지정해주어야 합니다.
RN에서는 이미지의 크기를 자동으로 계산하지 않기 때문에 꼭 명시해주어야 합니다.
3. 로컬 이미지는 require를 통해 가져옵니다.
import { Image, Text } from "react-native";
import { SafeAreaView } from "react-native-safe-area-context";

export default function TestScreen() {
  return (
    <SafeAreaView>
      <Image
        source={require("@/assets/images/splash-icon.png")}
        style={{ width: 50, height: 50 }}
      />
      <Text>테스트 이미지</Text>
    </SafeAreaView>
  );
}
CSS 다루기
기본적으로 CSS 파일을 사용할 수 없고 StyleSheet 객체를 사용해 컴포넌트별 스타일을 정의하고 각 컴포넌트의 style prop에 할당합니다.
RN 전용 웹 CSS 라이브러리 (styled-component, emotion, tailwind...)도 사용이 가능하다고 하나 나중에 차차 알아 봐야겠습니다!
import { StyleSheet, Text, View } from "react-native";
import { SafeAreaView } from "react-native-safe-area-context";

export default function TestScreen() {
  return (
    <SafeAreaView style={styles.container}>
      <View style={styles.box}>
        <Text>Box 1</Text>
      </View>
      <View style={styles.box}>
        <Text>Box 2</Text>
      </View>
      <View style={styles.box}>
        <Text>Box 3</Text>
      </View>
    </SafeAreaView>
  );
}

// 스타일 정의
const styles = StyleSheet.create({
  container: {
    flex: 1,
    flexDirection: "row",
    justifyContent: "space-around",
    alignItems: "center",
  },
  box: {
    width: 50,
    height: 50,
    backgroundColor: "skyblue",
    justifyContent: "center",
    alignItems: "center",
  },
});
1. View 태그는 기본적으로 display: flex 입니다.
RN에서는 모든 View 태그가 flex 컨테이너처럼 동작합니다.
2. 기본 flex 방향은 column
웹의 flex의 기본 방향은 row지만 RN은 column이 기본입니다. 따라서 가로 배치를 하려면 명시적으로 flexDirection: 'row' 를 지정해야 합니다.
터치 이벤트 처리 - onPress
RN 환경에서는 웹처럼 onClick 이벤트를 사용할 수 없습니다.
대신 모든 터치 이벤트는 onPress 를 사용합니다.
import { Button } from "react-native";
import { SafeAreaView } from "react-native-safe-area-context";

export default function TestScreen() {
  return (
    <SafeAreaView>
      <Button title="눌러보세요~" onPress={() => console.log("touched!!")} />
    </SafeAreaView>
  );
}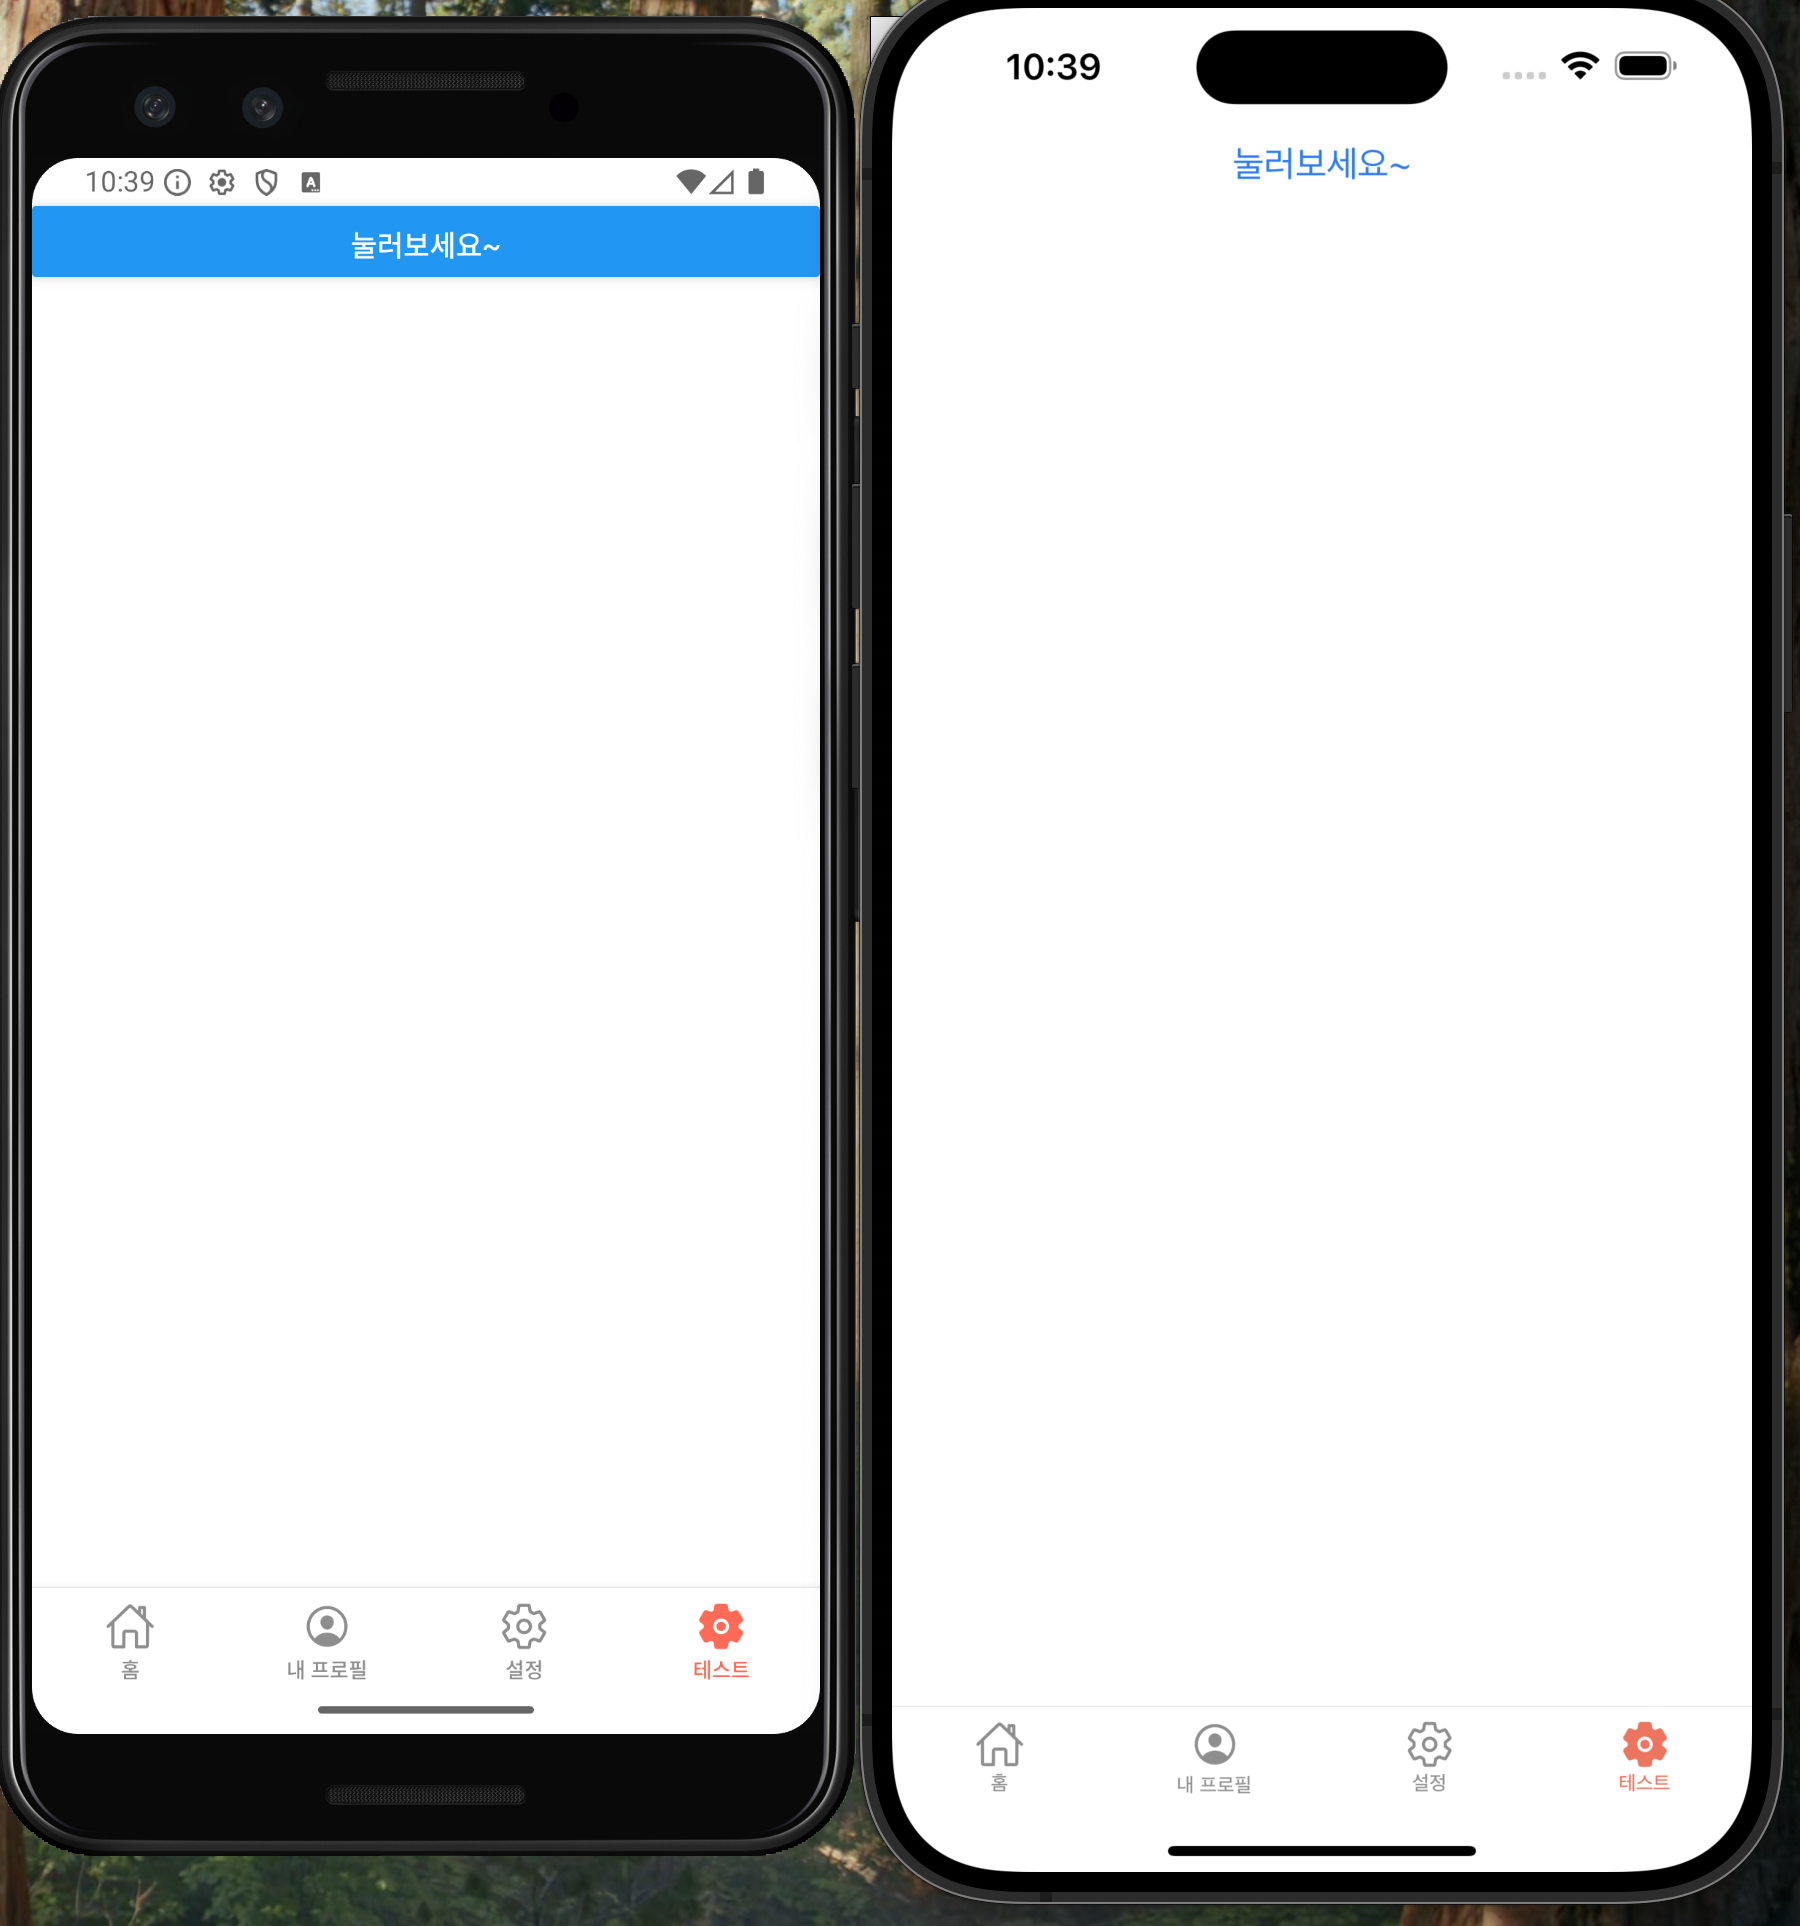
이때 Button 컴포넌트는 기본 스타일이 적용되어 있으며 ios/android에서 서로 버튼 모양이 달라 벌써부터 킹받습니다.
Pressable 컴포넌트
더 커스텀한 버튼이나 터치 영역을 만들기 위해선 Pressable 컴포넌트를 사용합니다.
import { Pressable, StyleSheet, Text } from "react-native";
import { SafeAreaView } from "react-native-safe-area-context";

export default function TestScreen() {
  return (
    <SafeAreaView>
      <Pressable
        style={({ pressed }) => [
          styles.button,
          { backgroundColor: pressed ? "skyblue" : "pink" },
        ]}
        onPress={() => alert("Pressable 눌림!!!!!")}
      >
        <Text style={styles.text}>눌러보세요</Text>
      </Pressable>
      );
    </SafeAreaView>
  );
}

const styles = StyleSheet.create({
  button: {
    padding: 10,
    borderRadius: 5,
    alignItems: "center",
  },
  text: {
    color: "white",
    fontWeight: "bold",
  },
});
Pressable컴포넌트는 pressed 상태를 제공해 눌렀을 때 스타일 변화를 줄 수 있습니다.- 버튼 외에도 리스트 아이템 등 모든 터치 가능한 영역에 사용이 가능합니다.
그 외 안전 영역 처리
앱에선 화면 하단에 고정된 CTA (Fixed Bottom Call To Action) 버튼을 자주 볼 수 있습니다.
import { Pressable, StyleSheet, Text, View } from "react-native";
import { SafeAreaView } from "react-native-safe-area-context";

export default function TestScreen() {
  return (
    <SafeAreaView style={{ flex: 1 }}>
      <View style={[styles.ctaContainer]}>
        <Pressable
          style={({ pressed }) => [
            styles.ctaButton,
            { backgroundColor: pressed ? "skyblue" : "pink" },
          ]}
          onPress={() => alert("CTA 버튼 눌림!!!!")}
        >
          <Text style={styles.ctaText}>구매하기</Text>
        </Pressable>
      </View>
    </SafeAreaView>
  );
}

const styles = StyleSheet.create({
  ctaContainer: {
    width: "100%",
    position: "absolute",
    bottom: 0,
    paddingHorizontal: 14,
  },
  ctaButton: {
    paddingVertical: 14,
    borderRadius: 8,
    alignItems: "center",
  },
  ctaText: {
    color: "white",
    fontWeight: "bold",
    fontSize: 16,
  },
});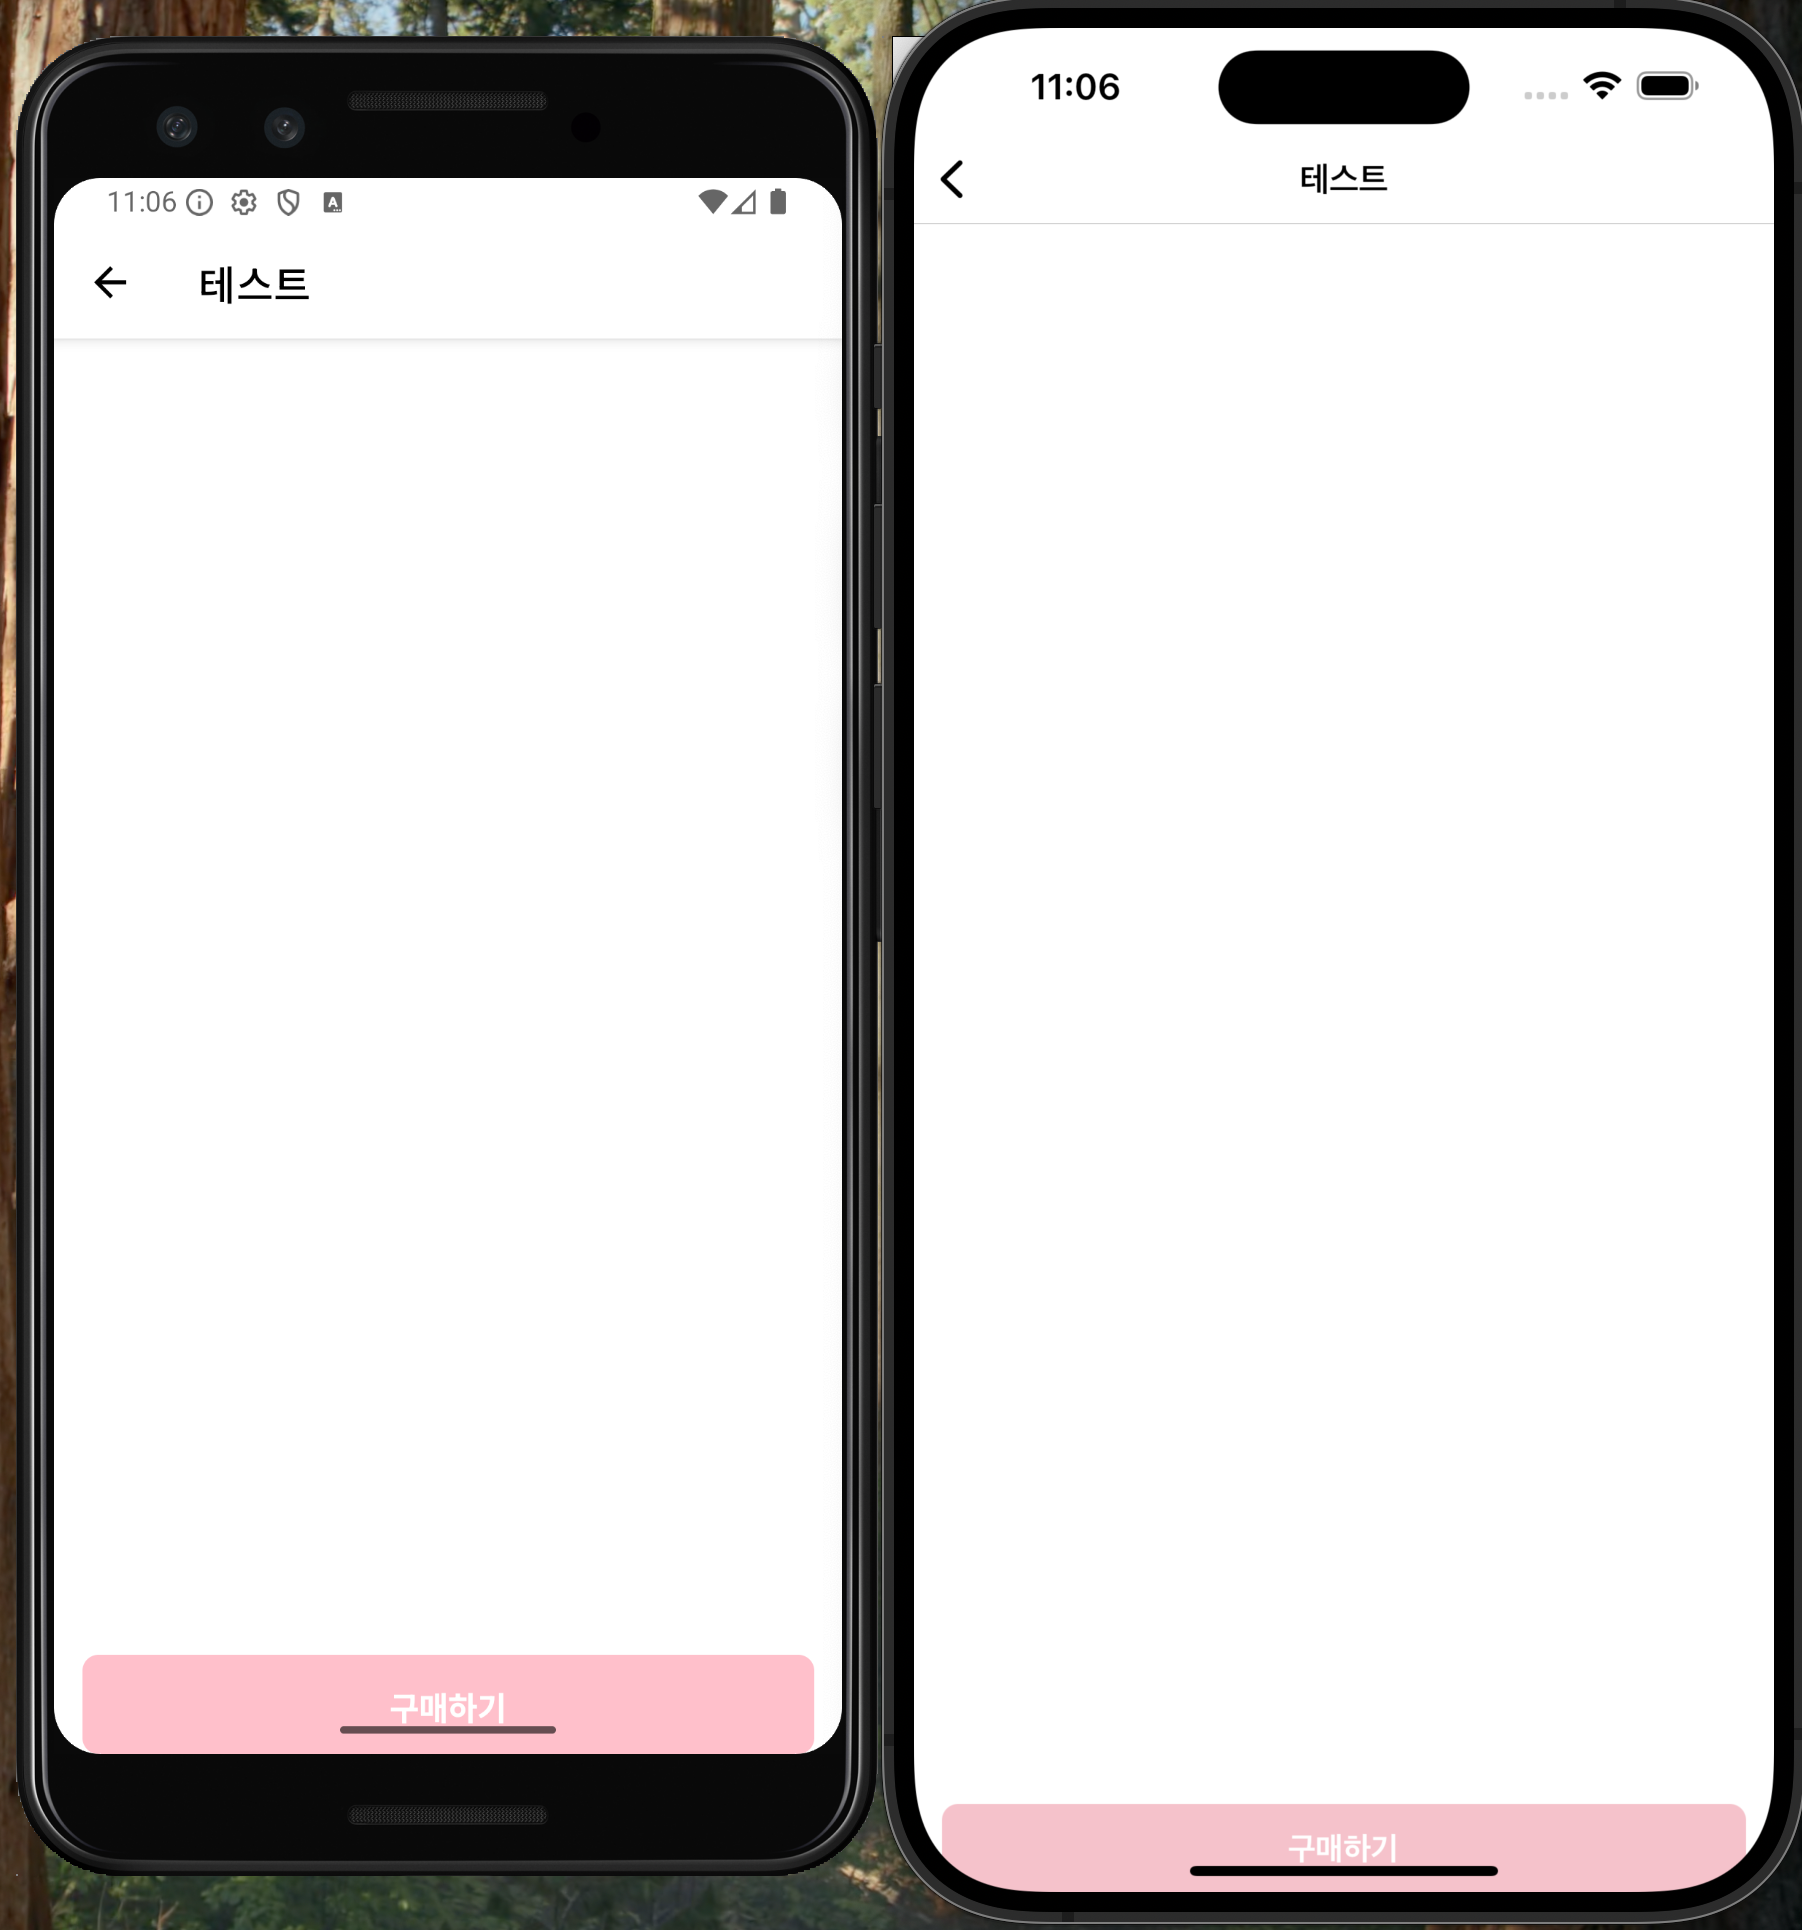
간단하게 UI를 구현했지만 ios/android 기기 모두 하단 홈바에 버튼이 가려져 원하는대로 나오지 않습니다.
이때 해결할 수 있는 방법은 react-native-safe-area-context 라이브러리가 제공하는 useSafeAreaInsets() 훅을 사용하면 쉽게 해결할 수 있습니다.
이 훅은 디바이스의 안전 영역(Safe Area) 값을 반환해주며 상단 노치, 하단 홈바 등을 고려해 UI 여백을 자동으로 적용할 수 있습니다.
import { Pressable, StyleSheet, Text, View } from "react-native";
import {
  SafeAreaView,
  useSafeAreaInsets,
} from "react-native-safe-area-context";

export default function TestScreen() {
  const insets = useSafeAreaInsets();

  return (
    <SafeAreaView style={{ flex: 1 }}>
      <View
        style={[styles.ctaContainer, { paddingBottom: insets.bottom || 12 }]}
      >
        <Pressable
          style={({ pressed }) => [
            styles.ctaButton,
            { backgroundColor: pressed ? "skyblue" : "pink" },
          ]}
          onPress={() => alert("CTA 버튼 눌림!!!!")}
        >
          <Text style={styles.ctaText}>구매하기</Text>
        </Pressable>
      </View>
    </SafeAreaView>
  );
}

const styles = StyleSheet.create({
  ctaContainer: {
    width: "100%",
    position: "absolute",
    bottom: 0,
    paddingHorizontal: 14,
  },
  ctaButton: {
    paddingVertical: 14,
    borderRadius: 8,
    alignItems: "center",
  },
  ctaText: {
    color: "white",
    fontWeight: "bold",
    fontSize: 16,
  },
});
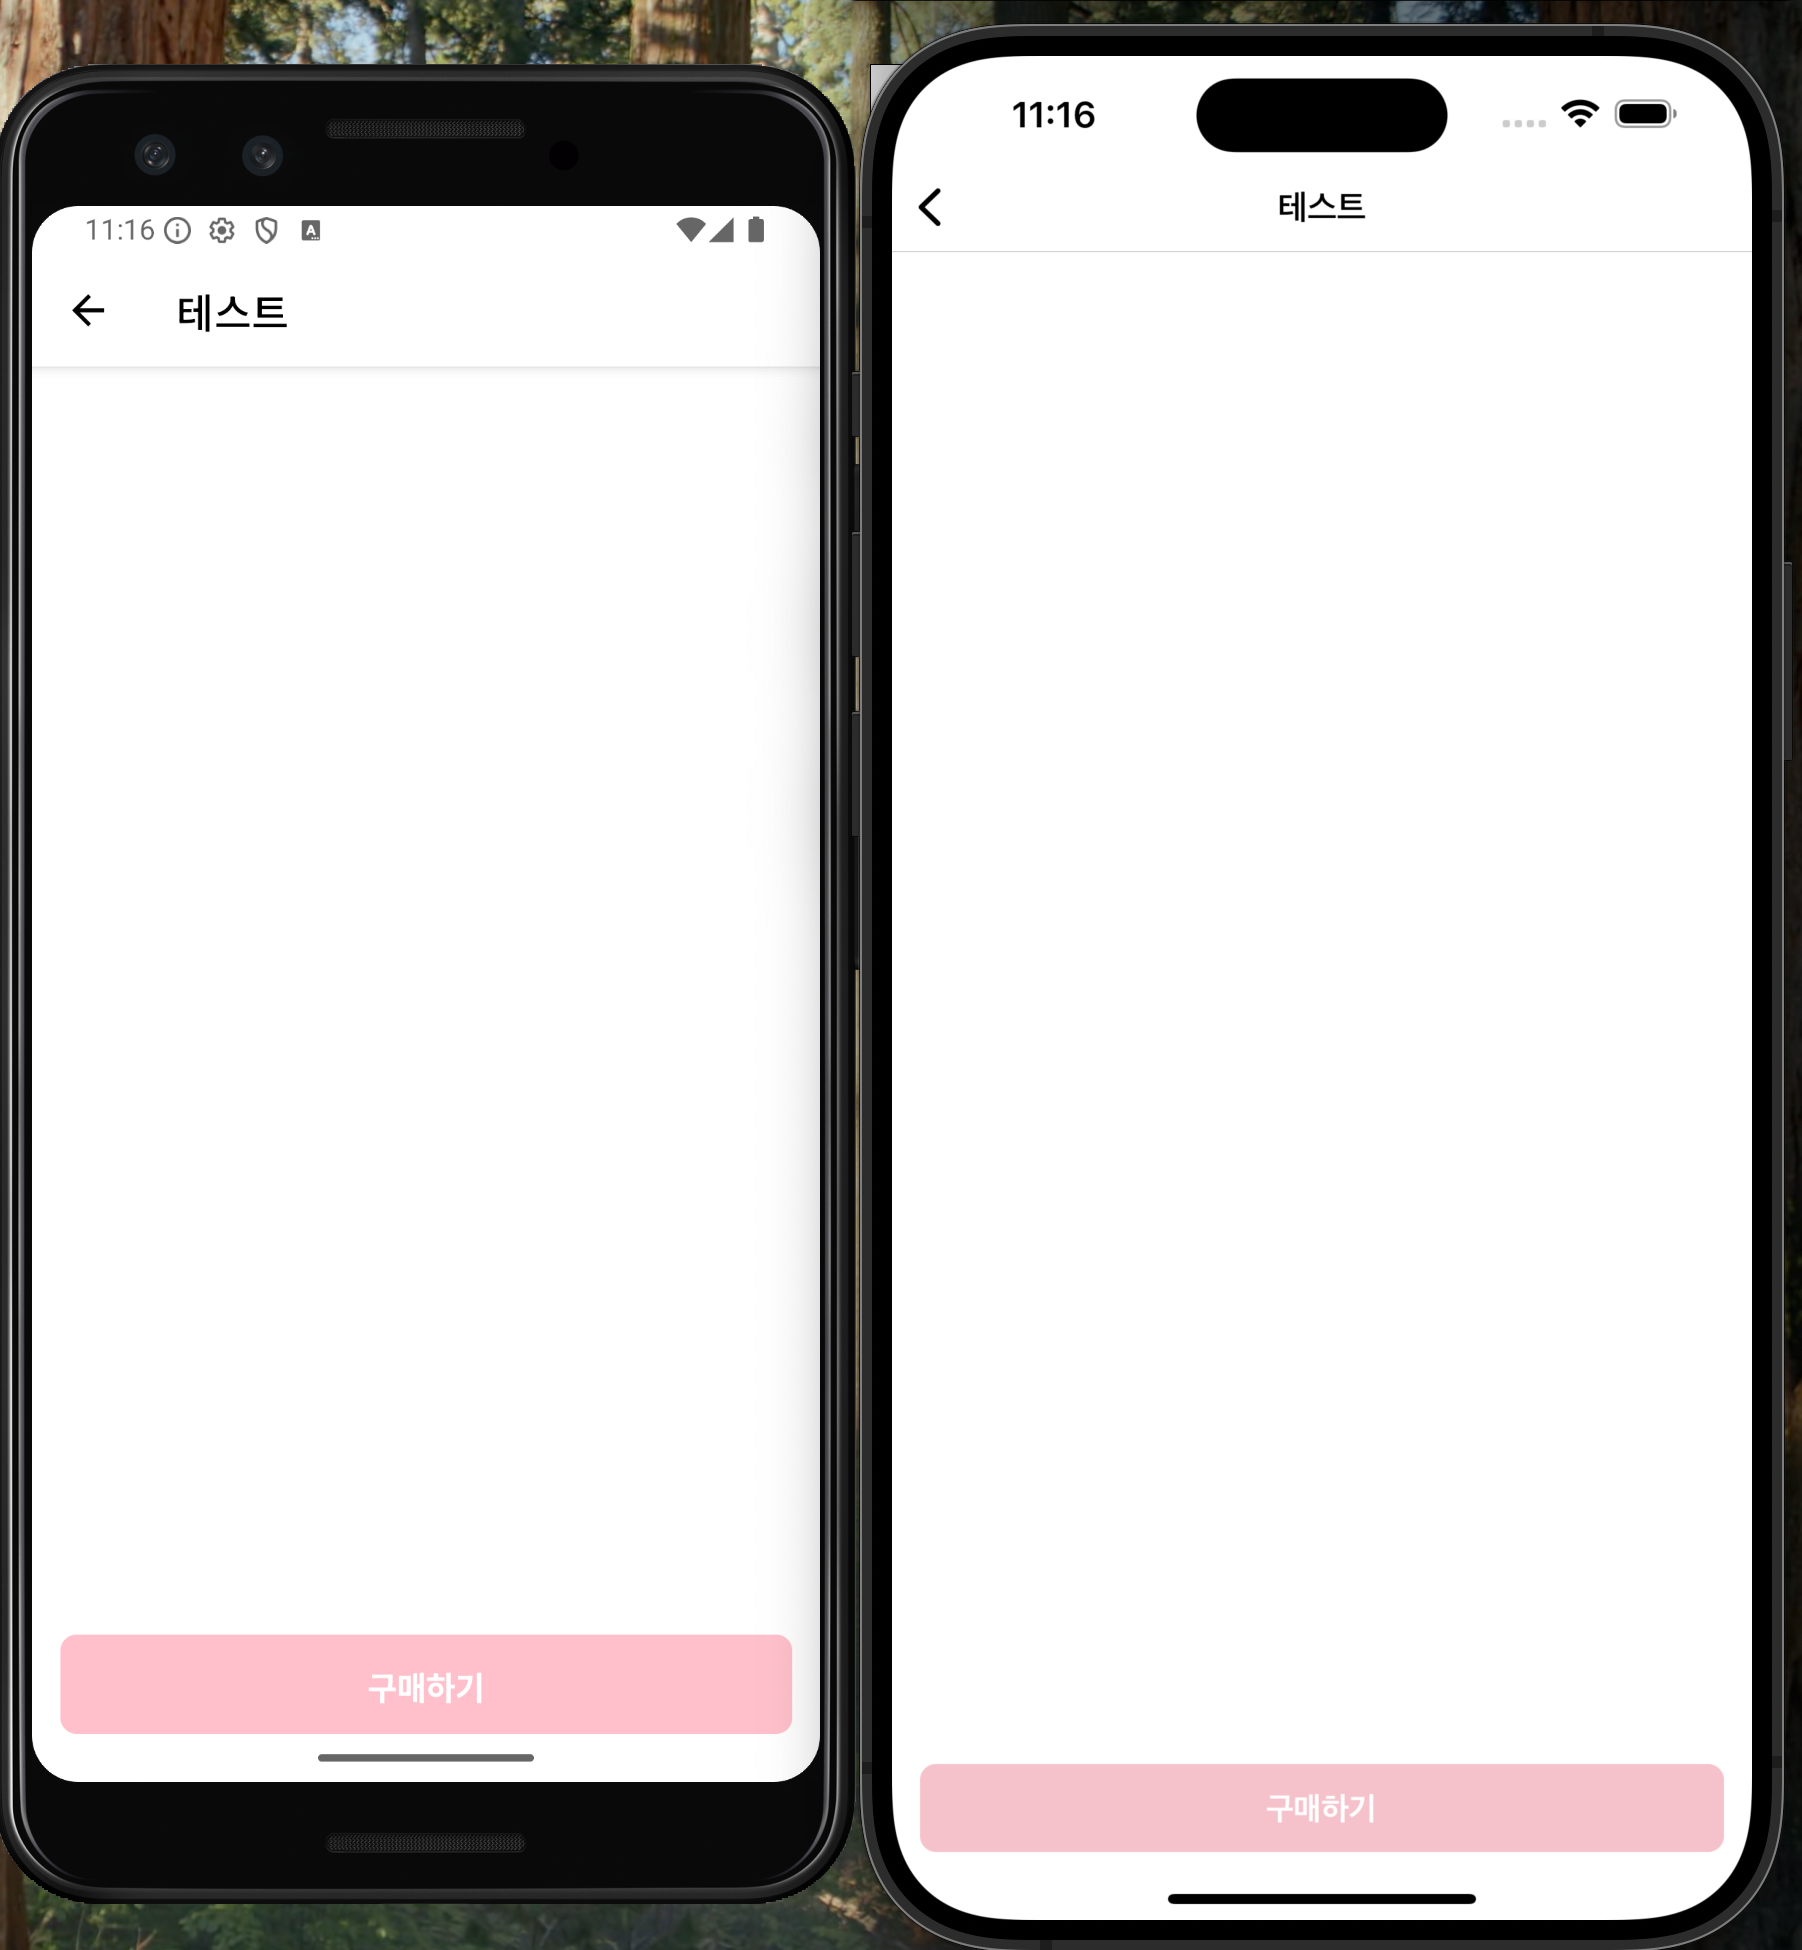
이때 inset 은 디바이스의 안전영역 정보를 자동으로 감지해 리턴하며, inset.bottom 은 화면 하단의 안전 영역 높이를 나타냅니다.
따라서 paddingBottom: insets.bottom || 12 처럼 기본 여백을 함께 지정해주면 홈바가 없는 기기에서도 최소 여백 확보가 가능해집니다.
마치며
직접 React Native를 학습해보며 React와 비슷한거 같지만 주의할 점이나 다른점에 대해 정리해봤습니다. 아직 기초 단계라 더 알아간 것이 생기면 추가로 계속 작성할 예정입니다. React 경험자가 앱 개발로 넘어올 때 참고할 수 있는 작은 가이드 정도로 읽어주시면 좋겠습니다. 새로운 걸 알아가는건 역시나 즐겁습니다!!